Purpose:
When you finish this activity, you should be able to:
|
Motion Detector and Pasco 500 interface |
|
DataStudioTM software |
|
graph matching activity files |
A graph of position vs. time and/or velocity vs. time is one of the most effective ways to describe motion. In this lab, you will use a "motion detector" linked to a computer to automatically draw kinematics graphs in real time for your one-dimensional motions. This makes it easy and natural for you to connect kinematics graphs and the motions the represent.
This activity is divided into two parts. In the first part, you will try to "match" a pre-drawn position vs. time graph - that is, you will try to duplicate the graph by executing the required motion. In the second part, you will try to "match" a velocity vs. time graph in the same way.
It will help to understand what's going on. "Motion detectors" don't actually detect motion. They work by sending out an ultrasonic sound pulse which strikes an object (you, in this lab) and reflects back to the detector. By precisely measuring the time for the pulse to return, the software can determine the distance to the reflecting object.
total distance traveled = (average velocity)(time) = (340 m/s)(0.017 s)total distance traveled = 5.8 m
The distance from the detector to you is half of the total distance = 5.8 m/2 = 2.9 m
The software calculates your velocity from the distance and time data that it collects. For example, if you were detected 2.9 meters from the detector at 1.55 seconds, and 3.0 meters from the detector at 1.60 seconds, your velocity would be calculated as:
Right now you are probably saying "Wow! This lab is computerized! What could possibly go wrong?" Well...
The reflection of the sound waves is not entirely reliable. Be sure that you are performing your motion in a clear area - no nearby walls, all furniture and extra people out of the way. If you can't get a good graph, try re-aiming the detector or moving nearby objects out of the way. It may help to hold a large piece of cardboard or a book in front of you to reflect the pulses more reliably.
In any case, your graph won't be perfectly "clean" and smooth. You will need to ignore the "glitches" in the graph, if possible (unless you really are jumping several meters and back in a hundredth of a second...). Keep in mind that since velocity is calculated from position, any slight problems in the position vs. time graph will be magnified in the velocity vs. time graph. Since accelerations are calculated from velocities in this software, acceleration vs. time graphs are pretty much impossible, but you can try them if you have time. If your software allows "smoothing" of your graphs, take advantage of it.
Keep in mind that the motion detector will not work well for objects closer than about 40 cm or farther than about 4 meters.
Safety Notes:
|
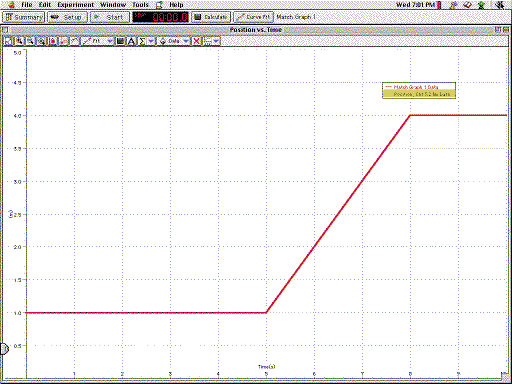
This is an image of the "Graph Match 1" activity for
position vs. time. The graph in red is the one that you need
to duplicate. To start the motion detector, press |
 |
|
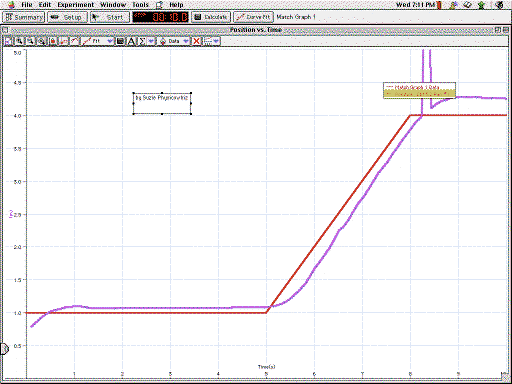
The screen shot at left shows a "real" position vs. time graph - the blue line, with the student's name on the graph. Each student should have 4 graphs - 2 position vs. time and 2 velocity vs. time for motions that they have executed. The "glitch" at the upper right is caused by the student being almost out of range of the detector. |
 |
For each of your 4 graphs, describe each phase of the motion
verbally - "Here I was at rest 1 meter from the detector", for
instance - on the graph. You can write this on the
printout, or if you have time you can use the text note feature
(![]() )
of the DataStudioTM graph (notice the pointer attached to
the note) to annotate the graph before you print it out.
)
of the DataStudioTM graph (notice the pointer attached to
the note) to annotate the graph before you print it out.
Each person should turn in their 4 annotated graphs.