Hypothesis:
 |
|
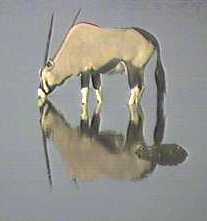
An eland drinking at the Namutoni water hole, Republic of South Africa |
In order to be considered correct, a scientific idea doesn't just have to survive one test, it has to survive many tests. This experiment asks the same question as Experiment 1, but attempts to answer it using a different technique, called the parallax method.
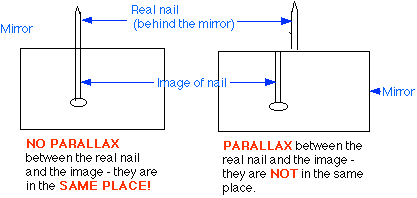
Here's how parallax works. Hold up the index fingers of your two hands so that one is directly in front of the other as you "sight" along them. Notice that if you keep your fingers still and move your head only, your fingers appear to move. This phenomenon is called PARALLAX - apparent relative motion of two objects caused by motion of the observer. You have observed parallax many times. For instance, have you noticed that as you drive down the street, a tree in front of a house appears to move across the front of the house as you drive by? Both the tree and the house were stationary, of course; their apparent motion was caused by your actual motion.
Now notice that as you move your fingers farther apart, the "parallax motion" is larger when you move your head by the same amount, and when you bring your fingers closer together, the apparent motion is smaller when you move your head.
We will make use of the fact that parallax causes apparent motion when the observer moves, to locate the image of a nail in a plane mirror. The idea is that if the image of a nail and a real nail are not in the same place, parallax will cause them to appear to move relative to each other when you move your head. When the real nail and the image are in the same place, however, there will be no parallax - and no apparent motion.
|
plane mirror |
paper |
graph paper |
|
2 large nails |
tape |
|
|
support for mirror |
straightedge |
Analyze your data just as you did in experiment 1, that is construct a graph of object distance vs. image distance. Be sure you:
Write a paragraph summarizing the results of your experiment, just as you did in experiment 1. In particular, the experiment was designed to answer a question (remember?) - so what's the answer? How confident are you in your answer (Go back and look at how closely your 2 image locations are actually one point.) If your results conflict in some way with the "accepted" (textbook) ideas - why do you think this happened? (Hint: do NOT (NEVER, NEVER, NEVER) use the terms "human error" or "experimental error". If you made a mistake (human error), go back and fix it. If some aspect of the equipment or technique used in the experiment was not precise enough to enable you to answer the question (experimental error) confidently, then specifically what needs to be changed and how should it be changed?) In other words, I want you to write a short paragraph, but I expect some thought to go into it!